Pulsar Vocal Studio offers intuitive, high-quality vocal processing with streamlined controls and versatile saturation, EQ, and effects. Ideal for quick, professional vocal shaping without overwhelming complexity.
Price
Pros
- All-in-one vocal suite with easy workflow
- Nice one-knob compression with clear visual feedback
- Smooth and effective de-esser that doesn’t dull the highs
- 3 distinct saturation types adding versatile tonal options
- Intuitive three-rack layout
- Great preset selection
Cons
- Limited control over advanced compression parameters
- Lacking some features like pitch correction, multiband dynamics, and advanced modulation
Today, we’re taking a deep dive into Pulsar Vocal Studio, a vocal mixing plugin that feels like having a vocal chain assistant who actually listens!
You know how mixing vocals can sometimes feel like juggling flaming swords while blindfolded? Yeah, same here. That’s why when I stumbled onto Pulsar Vocal Studio, I felt like I’d found a cheat code.
This vocal VST is more than another compressor or EQ, as it’s a full vocal processing suite that takes you from raw takes to polished tracks without needing 12 other plugins. You get everything from saturation and dynamics control to stereo FX, delays, reverbs, and even some wild whispery special effects that sound like they’re from another planet.
What really caught my attention was how intuitive it felt. I didn’t have to dig through a million submenus, just twist a few knobs, hit play, and suddenly my vocal sat in the mix like it always belonged there.
If you’ve ever layered ten different plugins just to get that radio-ready vocal sound, this might be your new favorite shortcut.
Let’s break it down and see what makes this plugin so dang fun to use
| Section | Feature |
| Top Rack | Sensitivity Control + Auto-Learn |
| Saturation Drive (Tube, Solid-State, Germanium) | |
| Gate | |
| De-Esser | |
| Compressor (Natural, Modern, Gritty) | |
| Compression Visual Feedback (LED Rings) | |
| Tone Type Selector | |
| Middle Rack | Parametric EQ (5-band + HP/LP) |
| EQ Amount Control | |
| EQ Presets | |
| Focus Enhancer (Air, Edge, Presence) | |
| Bottom Rack | Special FX Engine (Wide Stereo, Thick Octave, Wide Octave, Soft Breath, HF Whisper, Wide Breathy, Classic Chorus, Phasy Motion, Wide Movement, Breathy Octave, Ultra Large) |
| Delay Module (Modern-Disk-Tape Wide, Modern-Disk-Tape Ping Pong, Modern-Disk-Tape Slap) | |
| Reverb Module (Large-Medium-Small Hall, Large-Warm-Studio-Small Room, Long-Short Plate, Long-Short Spring, Gated Space, Chamber, Gated Ambiance, Epic Hall) | |
| Global / Other | Output Volume + RMS Matching |
| Preset Browser |
Features
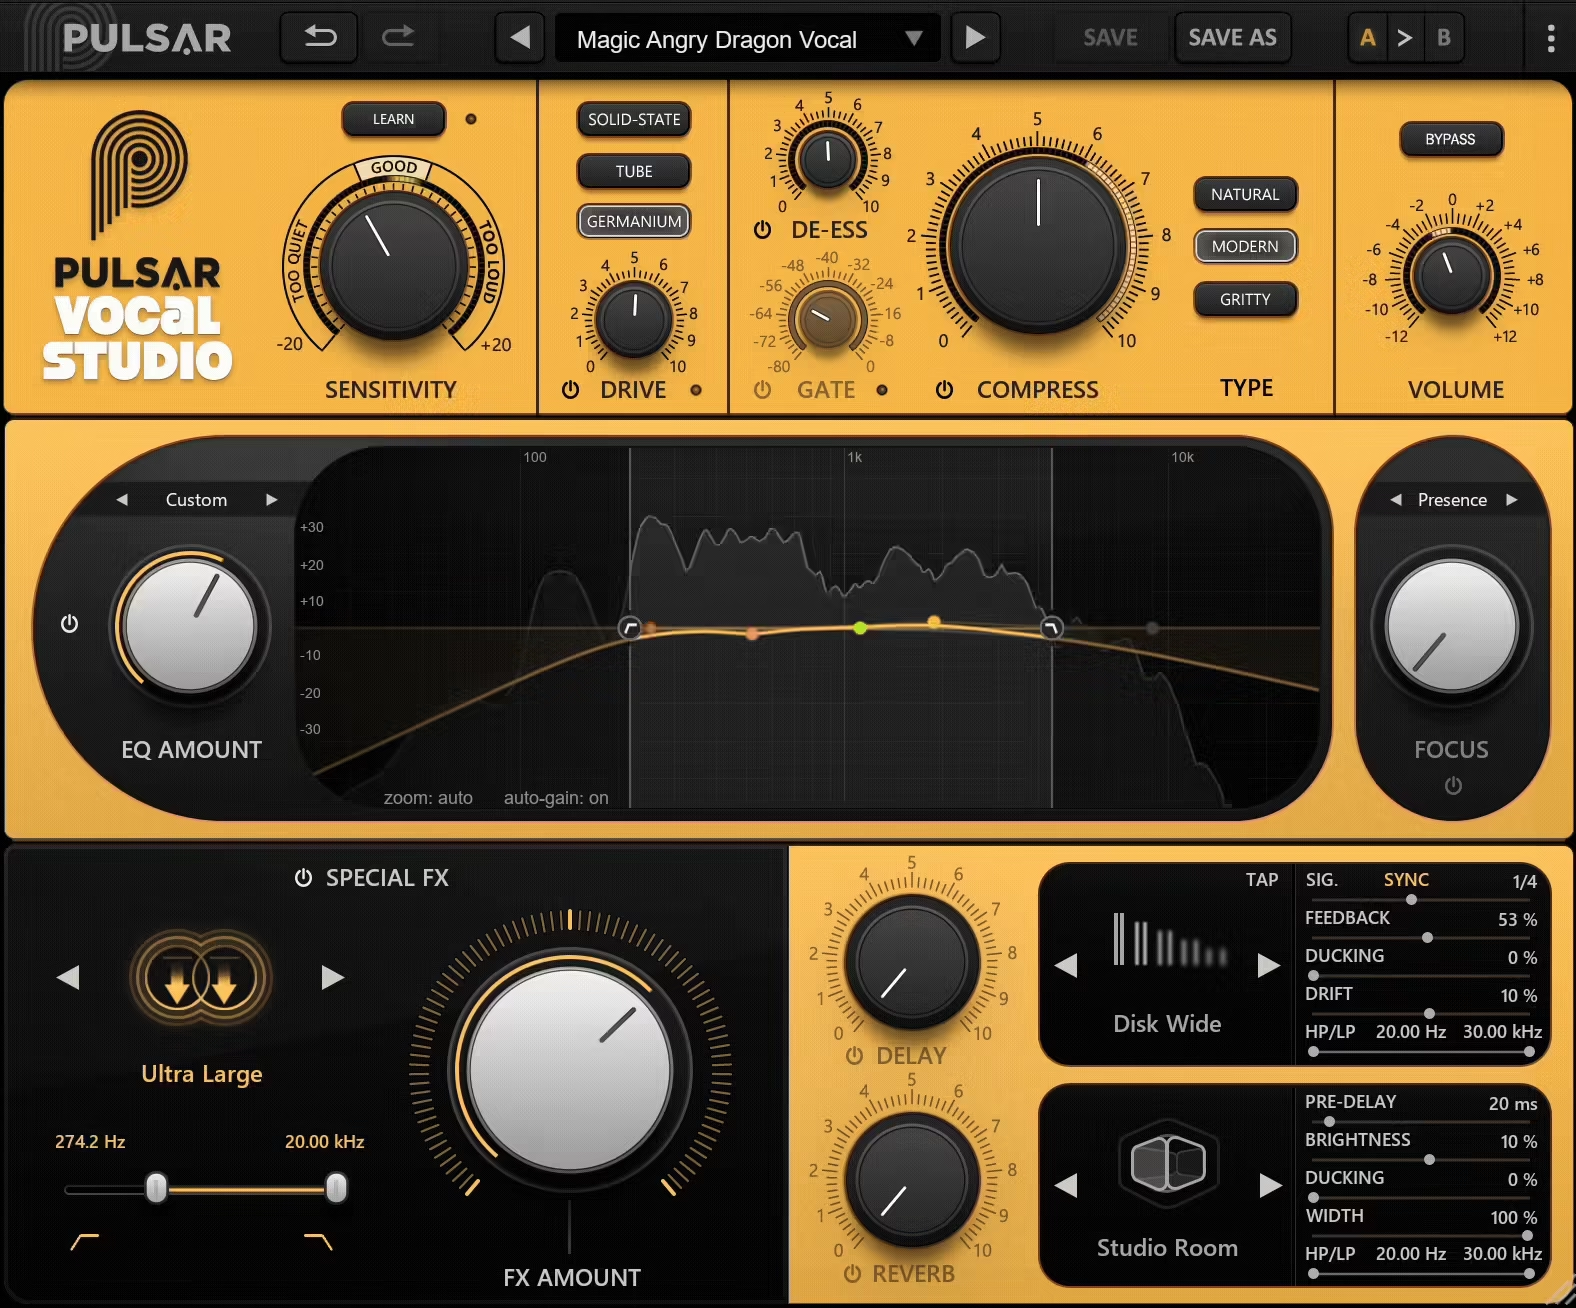
Pulsar Vocal Studio is organized into 3 main racks: Top, Middle, and Bottom, each packed with tools tailored for different parts of the vocal chain.
- All-in-One Vocal Processing Workflow
One of the standout qualities of Pulsar Vocal Studio is that it brings together nearly every tool you’d normally use on a vocal chain, compression, de-essing, EQ, reverb, delay, and even creative FX, into a single plugin. That means less plugin juggling and more time actually focusing on the performance.
Everything is neatly arranged into 3 “racks”: the Top Rack for dynamics and gain staging, the Middle Rack for EQ and tonal shaping, and the Bottom Rack for spatial and special effects.
The layout is intuitive, and I found myself getting results faster without flipping through menus or stacking a bunch of third-party tools.

- Sensitivity Calibration with Auto-Learn
Before any serious tweaking, the plugin helps you get your vocal signal right where it needs to be using the Sensitivity control.
You can do it manually, but there’s also a LEARN button that calibrates the input level for you during playback.
The LED ring tells you when you’re in the “GOOD” zone, yes, it literally spells it out for you. It’s a small thing, but this kind of visual feedback really helps take the guesswork out of gain staging.
The benefit? You can apply compression or saturation without accidentally introducing volume bias, making A/B comparisons more honest and useful.
- Single-Knob Dynamic Controls with Visual Feedback
Pulsar Vocal Studio simplifies the usual deep-dive into dynamic processing by offering single-knob controls for Compression, De-essing, and Gating. But don’t let the simplicity fool you, these controls are backed by sophisticated algorithms.
Each knob is surrounded by a responsive LED ring showing gain reduction in real time, so you’re never in the dark about what’s being applied. For example, when I was taming some harsh sibilance, it was easy to dial in just the right amount of de-essing without killing the airiness of the vocal.
- Multiple Compression Modes
The Compression Type selector gives you three distinct styles to play with:
Natural gets the transparent and classic, based on a FET compressor, while Modern has a faster and more forward approach, perfect for pop vocals that need to sit right in front. Finally, the Gritty adds edge and attitude, helping the vocal cut through busy arrangements.
Switching between these modes can dramatically change the vibe of your mix. Personally, I found “Modern” worked great for lead vocals, while “Gritty” added cool character to background stacks.

- Full Parametric EQ with Global Amount Control
In the Middle Rack, you get a flexible 5-band parametric EQ with high-pass and low-pass filters as wellas 3 traditional bell filters plus the ability to control the overall effect using an EQ Amount knob. That means if you like your curve but want to dial it back a bit, you can scale it without resetting your whole EQ.
There’s also a preset section to get you started quickly, and interactive controls make tweaking easy, click and drag bands, scroll to adjust Q, and right-click to bypass. It’s a familiar workflow with a few extra thoughtful touches.
- Dynamic “Focus” Enhancer for Vocal Clarity
The Focus section adds a unique layer of vocal shaping by dynamically enhancing specific frequency zones.
Choose from Air (for high-end breathiness), Edge (to lift 1–2 kHz presence), or Presence (around 4–5 kHz for clarity).
I often reach for “Air” when I want that modern, open top-end, it’s like giving your vocal an instant breath of fresh air.

- Creative Special FX Engine
Sometimes you want something more than just clean processing, and that’s where the Special FX section comes in. With presets like Wide Stereo, Thick Octave, Soft Breath, and Classic Chorus, you can take a vocal from subtle enhancement to full-on transformation.
Each preset has an Amount knob, and you can shape the effect’s tonal range with built-in high-pass and low-pass filters. It’s great for ad-libs, background layers, or any moment that needs a little sonic spice.
- Deep Delay and Reverb Customization
The Delay and Reverb sections in the Bottom Rack aren’t just afterthoughts. You get access to multiple delay types like Slapback, Ping-Pong, and Wide, along with tonal styles like Tape or Disk. Sync to tempo, tap your own delay time, or go wild with stereo width and feedback.
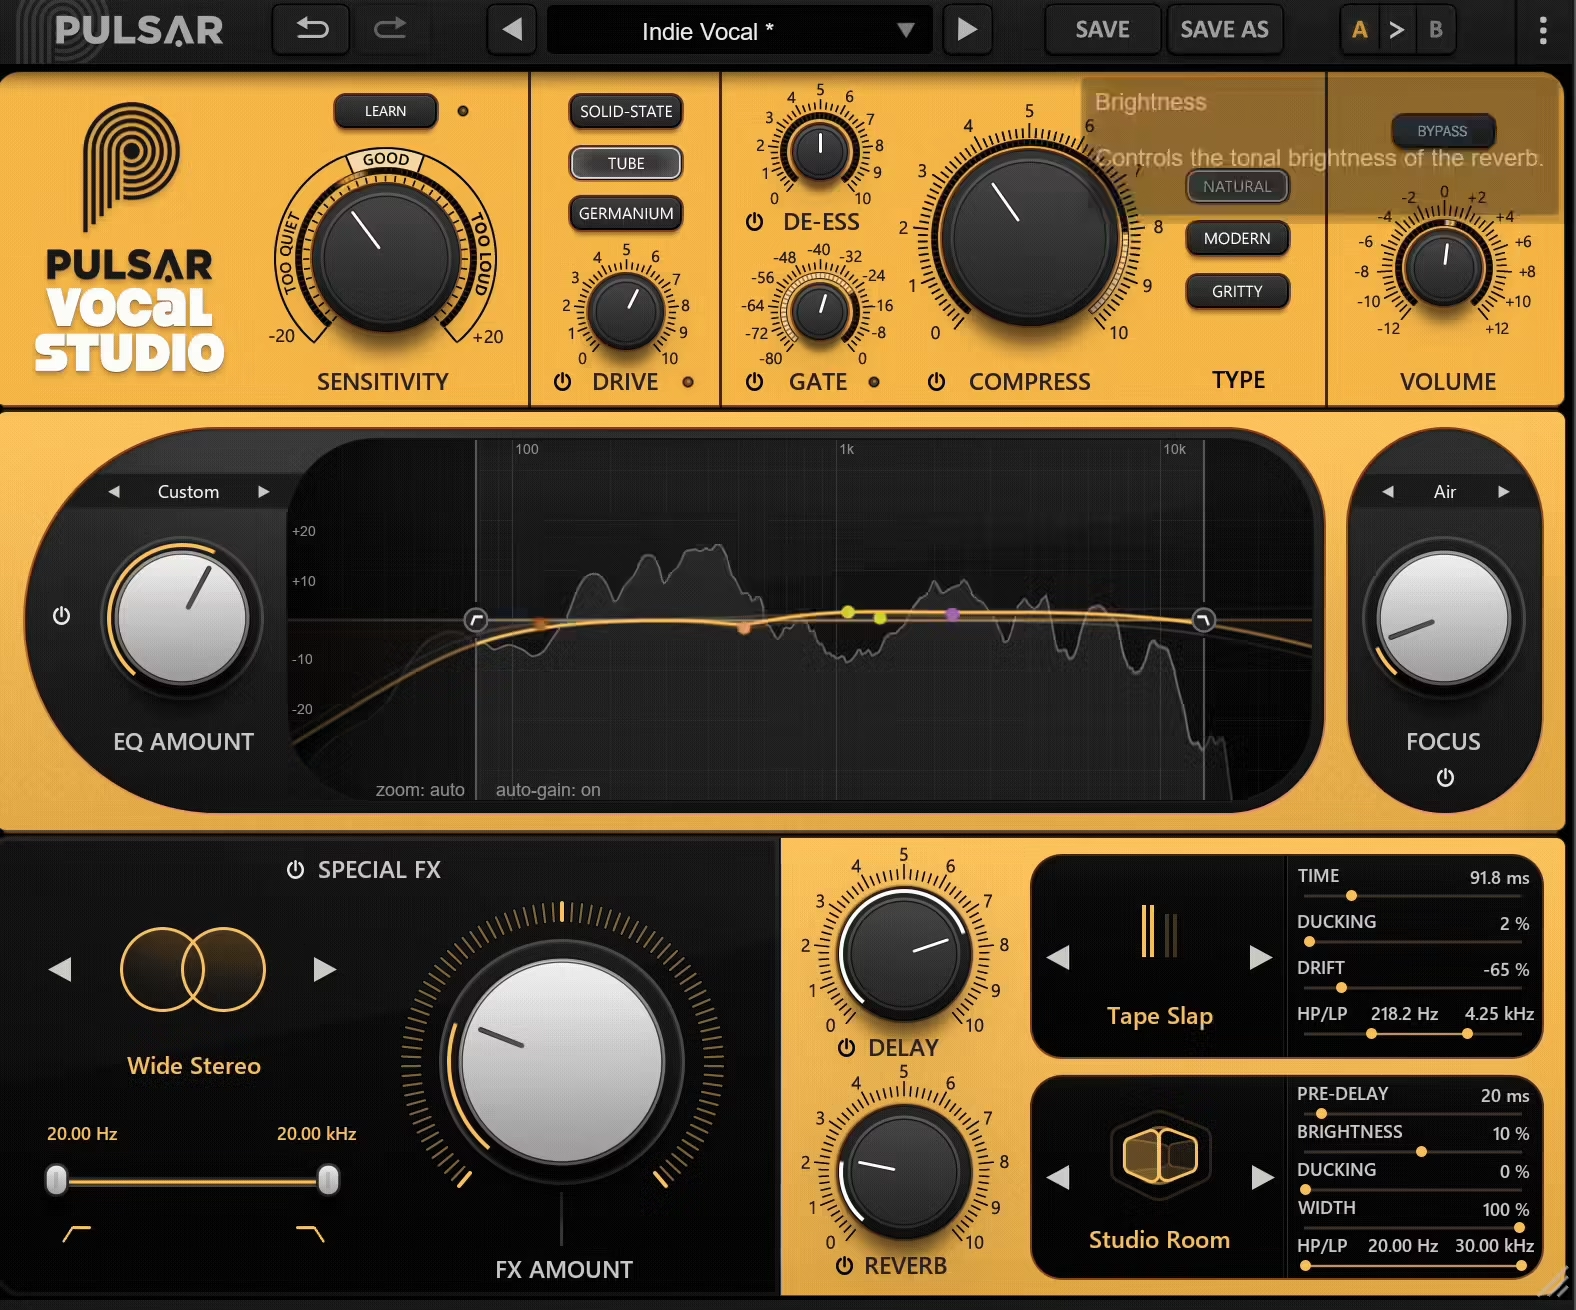
For Reverb, you’ve got classic types, Halls, Plates, Rooms, Springs, and even Gated, with detailed controls for pre-delay, ducking, brightness, and stereo width. And yes, there’s filtering here too to keep things clean.
- Output Volume with RMS Matching
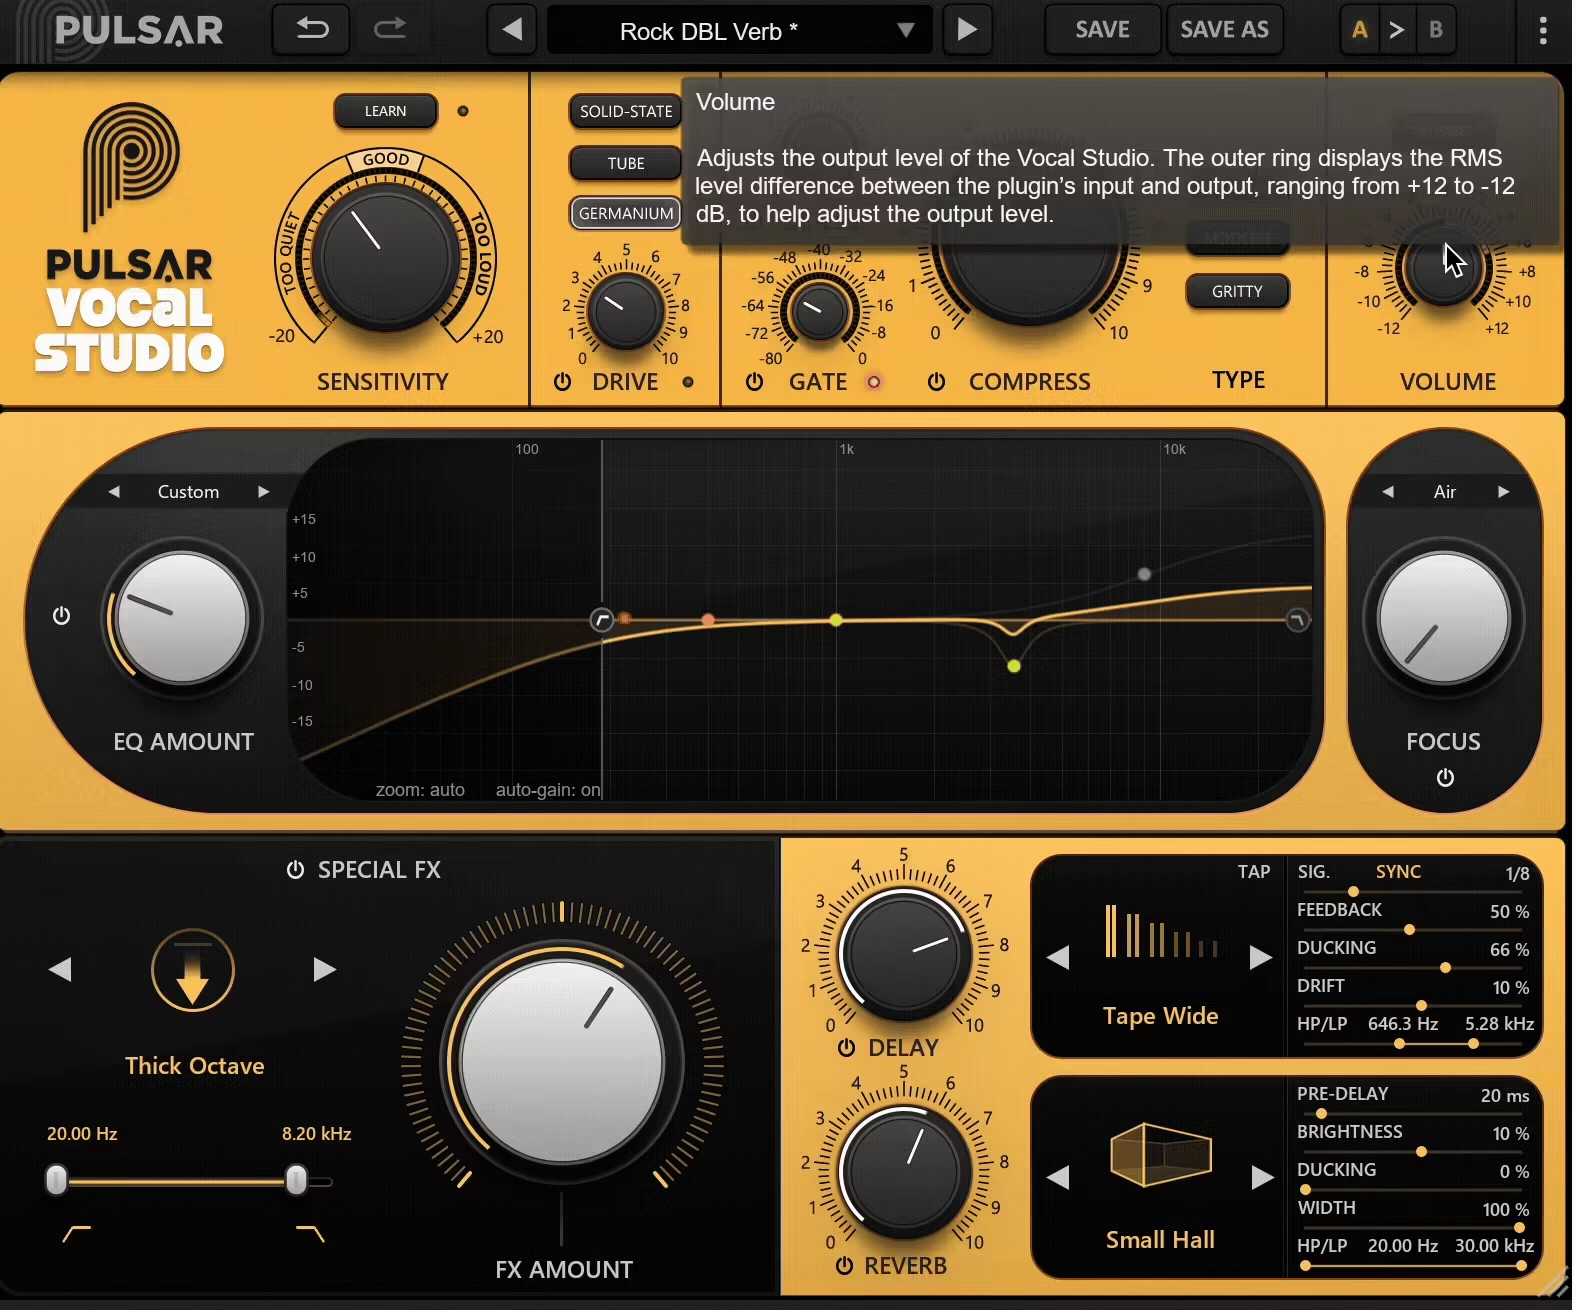
Finally, the Output Volume knob at the end of the chain helps you keep your level in check. There’s an outer ring meter that shows the RMS difference between input and output, helping you make sure you’re not being fooled by a louder signal when evaluating changes.
It’s subtle, but super helpful when you want your adjustments to be based on tone, not just volume.
Interface & Workflow
Interface
Right off the bat, Pulsar Vocal Studio’s interface looks slick, inviting, and well-structured, like someone actually asked a mix engineer what they needed. The yellow-black design looks aesthetically pleasing to my eyes, while the whole layout finds a good balance between retro and modern vibes.
As I said before, the whole GUI is separated into 3 main racks (Top, Middle, and Bottom), each labeled and color-consistent, making it super intuitive. It’s not just pretty; it’s actually practical.
The Top Rack is where the heavy vocal correction happens with Sensitivity, Saturation Drive, Gate, De-Esser, Compressor, and a Tone Type selector.
The knob placement feels natural, and visual feedback like the “Too Quiet / Good / Too Loud” meter under Sensitivity gives you a quick performance read at a glance. I also love the analog-styled gain reduction meters; they feel retro but sit nicely in this modern layout.
In the Middle Rack, the EQ is front and center with a familiar FabFilter-style display. You’ve got 5 bands, a slick Focus control on the right, and a big EQ Amount knob on the left. The curve is easy to manipulate, and color-coded nodes make tweaking effortless. It’s smooth, detailed, and easy to read, even for folks who fear EQ graphs.
Down in the Bottom Rack, the creative effects live: Special FX, Delay, and Reverb. The FX waveform selector is visual and fun, and the Delay/Reverb modules each have a parameter panel with things like Sync, Ducking, and HP/LP filters. It’s dense, but clearly laid out, as you know what every knob does without needing a manual.

Workflow
Using Pulsar Vocal Studio is like moving through an assembly line for vocals, but in a good way. Each station does its job, hands the audio off to the next, and it all feels seamless.
You start at the top with input management and cleanup, head to tone-shaping in the middle, and finish with vibe and polish at the bottom. It’s all top-down, literally and musically.
The Sensitivity knob is your first stop and it acts like an auto-gain input trim, telling you whether the vocal level is sitting in the “Good” zone.
Then there’s the Drive section, with Tube, Solid-State, and Germanium saturation flavors. Germanium adds fuzzy warmth, while Tube gives you that nice harmonic bloom. Gate and De-Esser help tame room noise and sibilance, and I found the De-Esser especially smooth; it doesn’t bite or dull the highs too much.
The Compressor has a one-knob design, with a meter above showing how much you’re clamping down. Next to it, the Tone Type toggle (Natural, Modern, Gritty) subtly shifts the plugin’s overall voicing, which is great for jumping between clean pop vocals and dirty hip-hop verses in seconds.
Once you hit the EQ section, you can sculpt the tone with precision. Adjust each band by dragging, then scale the overall intensity using the EQ Amount knob.
The Focus control on the right lets you isolate a key band, Edge, Body, or Air, like a fast-track to “make this vocal pop.” I ended up using Focus way more than I expected.
Down in the effects zone, the Special FX knob lets you blend in movement and stereo width, like Phasy Motion or Wide Whisper. For delays, Sync and Feedback are right where you want them, and the Ducking slider is a lifesaver for clarity.
Same for reverb: Ducking plus Brightness, Pre-Delay, and Width gives you full control over the tail without burying the vocal.
All in all, the workflow is fluid. You don’t get bogged down trying to find things, and the whole chain invites experimentation without ever feeling overwhelming. It’s a rare plugin where you can trust the layout to guide your ears.

First Impressions & Sound
The first thing that stood out to me when I loaded Pulsar Vocal Studio onto a vocal track was how quickly everything started to sound polished. There’s a certain clarity and control it brings that makes vocals feel like they belong in a finished mix, even before you’ve done any fine-tuning.
It doesn’t impose a heavy-handed character on your sound, which I appreciated. Instead, it offers a clean, professional base that you can shape as needed.
I think the Modern compression mode, in particular, adds a nice forward energy to vocals without feeling over-compressed or artificial. Paired with the EQ and de-esser, it’s easy to get a vocal sounding balanced and smooth in just a few moves.
There’s something really satisfying about how the Focus section works, especially the Air and Edge controls. They add presence and articulation in a way that feels musical rather than exaggerated.
I found myself reaching for those more than I expected, especially on vocals that needed a little extra lift without boosting harsh frequencies.
The delay and reverb modules are another highlight. They’re simple but effective, with just enough flexibility to blend ambiance into a vocal without crowding the mix. Ducking the reverb or filtering the delay makes a big difference in keeping everything clean, especially in dense arrangements.
What I didn’t expect was how versatile the plugin is. It’s easy to assume that an all-in-one vocal chain would be limited to basic needs or beginner workflows, but this one holds up in more demanding sessions, too.

It handled a wide range of vocal types from soft spoken-word recordings to bright, dynamic singing without breaking a sweat.
I tried it on a podcast edit, then on a trap vocal stem, and then on a rock vocal double, and in each case, it adapted well without needing to be completely reconfigured.
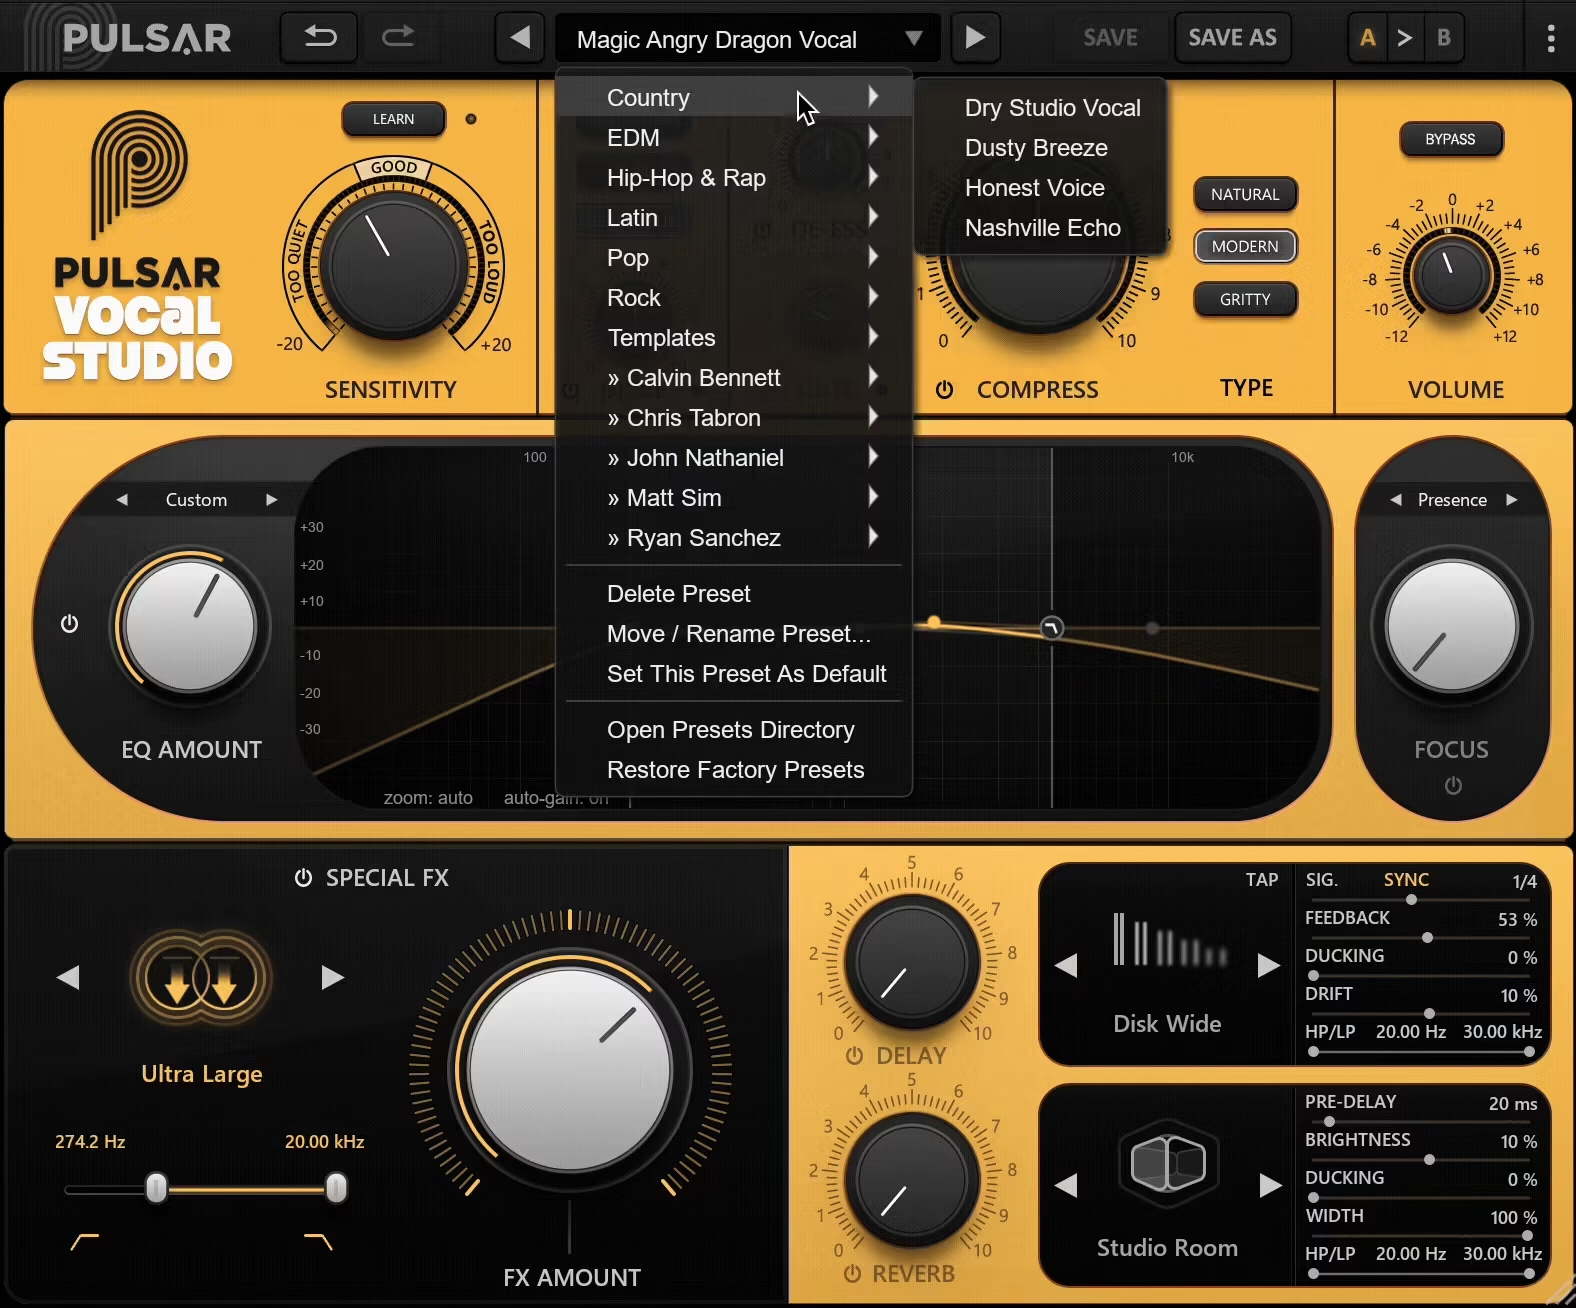
The presets are genuinely useful and not overcooked, which makes them great starting points even for more experienced users. Also the range is great with so many choices for different genres.
That said, there are a few things that might hold some users back. If you’re someone who likes to dive deep into compressor settings or customize the signal path, you might feel a bit restricted. The plugin doesn’t let you change the order of the modules, and you won’t find advanced controls like attack and release times or frequency-specific sidechaining.
It also doesn’t include any pitch correction, so if vocal tuning is part of your workflow, you’ll still need a separate tool for that.
But in terms of what it does offer, it delivers a fast, musical, and reliable vocal processing chain that genuinely improves workflow without compromising sound quality.
Overall, I was impressed with how much this plugin accomplishes without asking much in return. It’s efficient, sounds great, and makes vocal mixing feel less like a technical chore and more like a creative step in the process.
Compatibility
Here’s the full compatibility and system requirements table, including supported plugin formats and OS specs:
| Specification | Details |
| Plugin Formats | VST 2.4 (64-bit), VST 3 (64-bit), AAX (64-bit), Audio Unit (64-bit) |
| Windows | |
| CPU | Intel Core i3 / i5 / i7 / Xeon |
| Memory | 4 GB RAM |
| Disk Space | 1 GB free disk space |
| Graphics | OpenGL 2.0 compatible GPU |
| OS | Windows 7 and higher |
| Screen Resolution | Minimum 1024×768 / Recommended 1280×1024 or 1600×1024 |
| macOS | |
| CPU | Intel Core i3 / i5 / i7 / Xeon / Apple Silicon (M1, M2, etc.) |
| Memory | 4 GB RAM |
| Disk Space | 1 GB free disk space |
| OS | macOS 10.11 and higher |
| Screen Resolution | Minimum 1024×768 / Recommended 1280×1024 or 1600×1024 |
Final Words
Pulsar Vocal Studio pulls off something rare; it’s packed with features but still feels easy to use. Whether you’re dialing in a fast vocal chain or fine-tuning every detail, it strikes a nice balance between control and simplicity. It’s not flawless, but it’s definitely one of the more thoughtful and musically useful vocal plugins I’ve tried in a while.
It’s clear that Pulsar Audio aimed to make something that speeds up your workflow without boxing you into presets or templates. You can go subtle or extreme, polished or gritty, all within the same interface. It might not replace every tool in your chain, but it does a surprisingly good job of covering most bases in one go!
Happy mixing!


